Monday, October 24, 2011

Spanish recipe - Empanada

Happy Monday!
The last five days my little girl has been sick. She is still under the weather, but is coming out of it. Thank goodness!
Today, I am going to be sharing with you one of my favorite recipes, Empanadas. Empanada are these delectable golden stuff pastries that can be bake or fried and stuff with difference things. For example, they can be stuff with any meat, seafood, cheese or fruit. This is a very easy recipe and you and your family would love them!

2 pastry puff sheets thawed
1 egg (to be use as an egg wash)
2 Tablespoon of Olive oil
1 1/2 pound of ground beef
1 green pepper chopped
1 medium red onion (or yellow onion) finely chopped
2 cloves garlic, minced
2 tsp salt
1/2 tsp ground black pepper
1 tsp dried oregano
1 bay leave
1 8oz can tomato sauce
1/2 cup ketchup
1/2 cup of water or beef stock or white wine
1/2 cup pimento-stuffed Spanish olives

Pre-heat oven on 350 degrees.
1) On a medium-high heat add ground beef to a large pan and cook till browned, then remove from pan and set aside.
2) Add olive oil and saute onions, green peppers, garlic till onions are translucent
3) Return the meat to the pan and add salt, black pepper, oregano, bay leave, tomato sauce, ketchup, beef stock and Spanish olives. Mix and simmer on low for 30 minutes.
4) While the meat is cooking take pastry puff and roll onto a flour board and cut in three strips and then cut each strip in half. Place each square on baking sheet.
5) Scoop meat onto pastry and seal with fork.
6) Slightly beat egg and with a pastry brush, brush each Empanada with egg wash and bake till golden brown.

#2 
#3
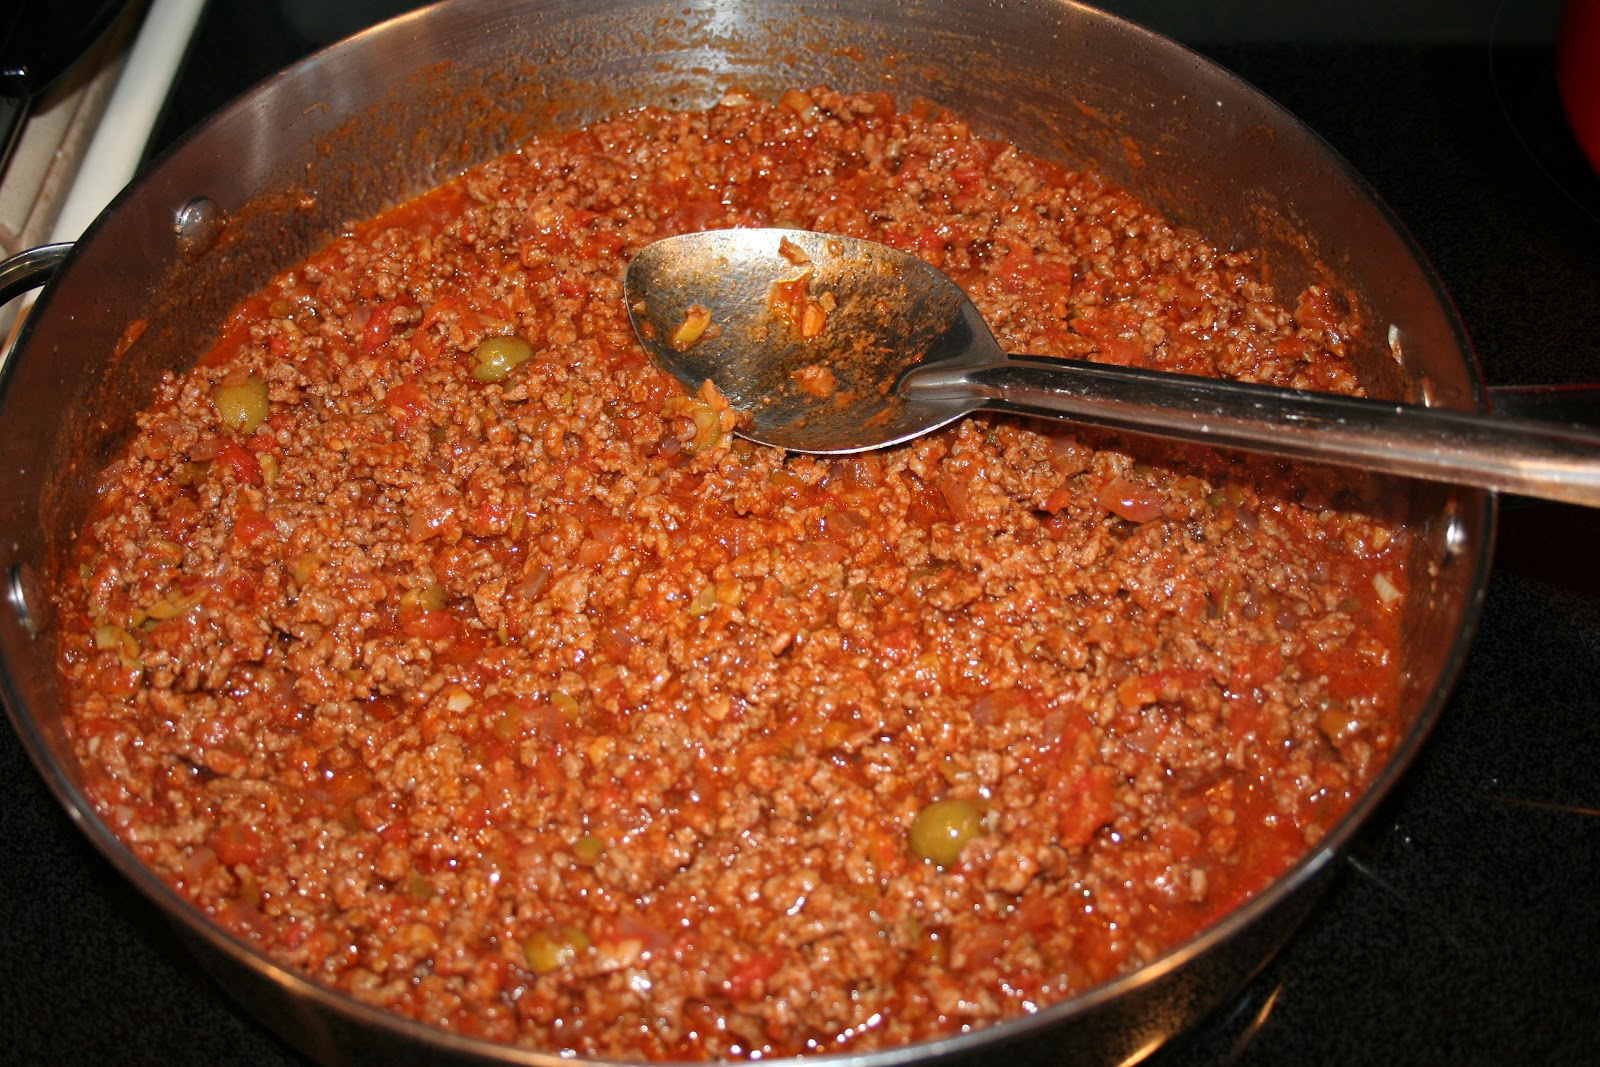
When all ingredients are added taste to see if it has enough salt and black pepper.

#4
#5 
#5
Scrumptious empanada!
I served these yummy golden pasties with a side of plantains and salad, this is truly Spanish meal you will enjoy. This is an easy meal so try it out and let me know how you like them. Happy Eating!  Thank you for stopping by and I LOVE comments, so drop me a line. Have a great week.

Vanessa

Thursday, October 20, 2011

Fabric wall art and DIY Chair

Hello, Friends
Here are a few projects I worked on this week. I recovered this message board, with a orange Damask fabric. I have a thing for damask print right now, its just lovely!
Fabric message board
Cut fabric to size and hot glue it around the board.
Make sure to tuck the corners nicely. 
Voila!
I can use this as a message board or as a fabric wall art, but I decided I am going to use this as wall art. I have something else I am going to add to this piece, so this project is to be continue. : )

I decided I want a wall of plates, so I started off with these plates for right now. I will be shopping around for some more plates to add to this wall. This project is to be continue. : )
I added my wall art with another piece to my kitchen counter. I am always in my kitchen and I enjoy looking at these two pieces everyday. These are powerful words! 
Last weekend I went to three yard sales and I found this lovely chair. Yes, its ugly, but will be lovely soon. I just wanted to show you the before. This chair looks rough! I need to decide what color I am going to paint it, before this weekend. Any ideas my dear bloggy friends? I love your comments and I live for them. : - ) So, drop me a line.


I am so glad I am able to cross things off my list as the holidays are fast approaching. I love this time of year, because I am able to gather with my family and friends and make beautiful memories. I love for my photos this year to look different from last year, hence this is why I am changing things around. I have four weeks to finish all my projects and I should be done. I am so glad you stop by and remember I LOVE comments. Have a Bless day! 

Vanessa

Friday, October 14, 2011

DIY Projects

Happy Friday!
As you may or may not know there is only 71 days till Christmas. Yes, I said it, 71 days. I can't believe the year is about to end soon. Amazing!

Well, I have a very A type personality and I am very organized as well. I have a list to do before Thanksgiving and Christmas. Here are some of my DIY projects I have finished.

This swag had some gaps, so I added ribbon to hide them.
I used floral wire to wrap the ribbon. 

You can see peeks of the ribbon.

I have this hanging over the fireplace, but come Thanksgiving it will be part of the center piece. Pic to follow
The iron design I had for a while and just got tired of the color. 
 I took my lovely Red Banner Krylon paint spray and went to town. I love red!

Just the right amount of pop of color to make it stand out on the wall. 
What do you think? I love comments, so drop me a line. Do you remember those sprayed painted plates I did a while back? Well, I am finishing those up and will be posting them soon. Thank you for stopping by and have a Bless weekend.

Vanessa

Wednesday, October 12, 2011

Birthday Tutorials

Happy Wednesday!

I wanted to share with you two projects today. The first is the pinta and the second is the birthday banner. These are easy and inexpensive party favorite you can whip up for any occasion. I know there are more elaborate pinta and with some cardboard, paper towel rolls it can be done. But, since my theme was balloons it was easy to make.

Materials you would need:
balloon
different acrylic paints
1' inch strips of newspaper and white copy paper
mod podge or Elmer's glue or the flour paste recipe you can see here.  

1) After a few tries I found it easier to place the balloon in a bowl. I use mod podge on each strips of newspaper and placed it on the balloon going in one direction, then for the next layer I went the opposite direction and so on. Once I covered the balloon with three layers of newspaper then I added one layer of white copy paper. Before adding each layer, make sure each layer is dry before adding the next layer.


Three layers of newspaper, then add the white paper

Paint half of the pinta first. 
Pop the balloon and remove.

Before closing the pinta add your candy and punch two holes one on each side and run string through the holes. Next add more strips of white paper with glue and paint over.
Paint the pinta and add ribbon.
I love the idea of adding a personalize birthday banner, this was also a very inexpensive party decor. I also love the fact I didn't have to use my sewing machine.

Materials needed:
1 to 2 yard of fabric folded in half
1 yard of felt
Glue gun
Acrylic paint
ribbon

I had two yards of fabric and I need 21 pieces for the banners and 21 felt circles to go on top of the fabric. In order to make the cutting process go faster I fold the fabric in half and ironed. Then I made a template out of scarp booking paper and pin around the fabric. Using a pinking shears cut your fabric.
I used pinking shears so the fabric wouldn't fray. 
Next, I made a circle template and pin and cut my felt with regular scissor. Once all cut, I hot glue the felt onto each fabric piece.
I found painting on felt does not bleed through to the light weight fabric. 

Taking my template I just painted each felt. 
After each letter was painted and dried I hot glue each fabric to the ribbon. Make sure you glue the fabric pieces to the back side of the ribbon.
Backside of banner

You can add a bow at each end of the banner and between Happy Birthday as well. So what do you think? I loved how these two pieces came out and the total cost was $5. Love it! I love comments so drop me a line. Have a great week!

Vanessa


Monday, October 10, 2011

Birthday Party Decor

Happy Monday!
My family and I had a great time this past Saturday celebrating our sweet girl's birthday. Its hard to believe she is 4 years old. Makes me want to cry just a little. : ) Our sweet girl just loved her birthday party and kept telling me how beautiful the birthday decorations were.  She loved playing with her friends and she was non stop on Saturday from 7am till 9pm. It made our hearts so happy to see her happy and how she is blessed to have family and friends who love her very much. We had a great time despite the bad weather we had. Everyone showed up and we had a great time. Here's a peek.


Birthday banner, pin wheel center pieces, birthday wreath and more pin wheels
I made a Birthday wreath and it is in her room now.

Our sweet girl. She loved getting all dressed up and she even loved wearing my vintage necklace
Her outfit happened to match the birthday decorations. 

Can you see the colors on the banner and her dress are alike. She was jumping for joy and couldn't wait for her party to start.
She loved every gift she received. 
She is thanking one of her friends for her birthday gift.
I made this pinta and the kids enjoyed it.
Chocolate chip cookie birthday cake and some cup cakes for the children. 
My husband, our son and daughter and me.
By the end of the party we had a great time and we were all very tired. Last week was a busy week, with making decorations, cleaning, buying food and making food for the party. When Sunday came around I couldn't get out of bed and even today I am still a bit tired. A nap sounds good right about now. I want to thank my hubby and son for helping out before the party. I am so grateful for them. Ladies, I want to thank you all for your kind words from last Friday's post. I really appreciate and I am very grateful for all your support. I LOVE comments so drop me a line.

Vanessa

Wednesday, October 5, 2011

Fall Mantle

Took a break today from doing birthday decorations and I finally decorated my mantle. The fire mantle is one project I would love to redo, however we are not ready to take on this project. I have seen beautiful mantles, but with my mantle its more like a love and hate relationship, so I am going to be grateful I have a mantle and make it look lovely for the fall. I have two looks and I would love for you all to tell me which one you love. Everything I used is from stuff I had on hand, yard sales and the dollar store.
The mantle, the wood is rough cut cedar wood

First look -added some pumpkins, candles, mirror and fall leaves.
After I was writing this post, I realized I didn't care too much for this look and I redid the mantle again. This is the second look and I love the way the mantle looks now.

Second look - not cold enough for a fire, its just for ambience 
True story, I forgot we closed the flue so the smoke was coming in the house. I had to laugh, because I was trying really hard to set the mood. LOL! The good thing it was only paper burning and it was burning out. Lesson learned.


This is a meddlion

Put the swag underneath. It looks like it fills the space.

Add fabric and leaves and I made art.


Living in Florida, I don't really get into fall till October, so how did I do? I love the second look, which one do you like? I love comments so drop me a line and let me know what you think. : )  Have a great week.

Vanessa